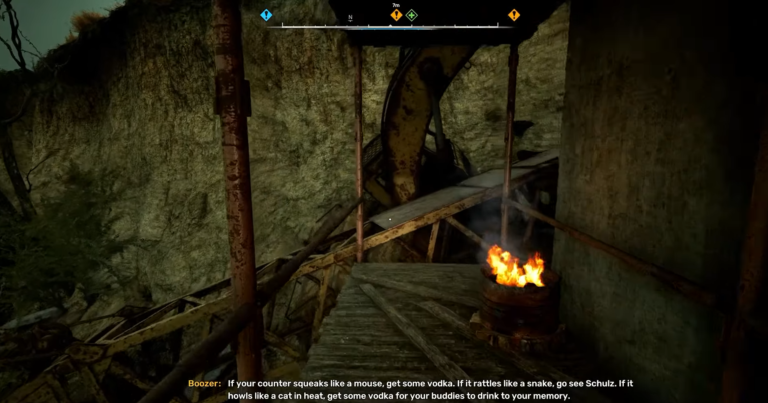
Finding Nestor’s stash in Stalker 2 Heart of Chornobyl is an exciting part of the game. This game takes place in a dangerous world filled with strange creatures, hidden treasures, and other stalkers. Players must explore this large open world, complete missions, and gather important items to survive. Nestor’s stash contains valuable items that can help you during your journey, making it very important to find. This guide will show you where to find Nestor’s Stash in Stalker 2 Heart of Chornobyl easily. You will enjoy the thrill of discovery while facing the challenges of the Zone.
First Understanding the Quest (The Price Goes Up)
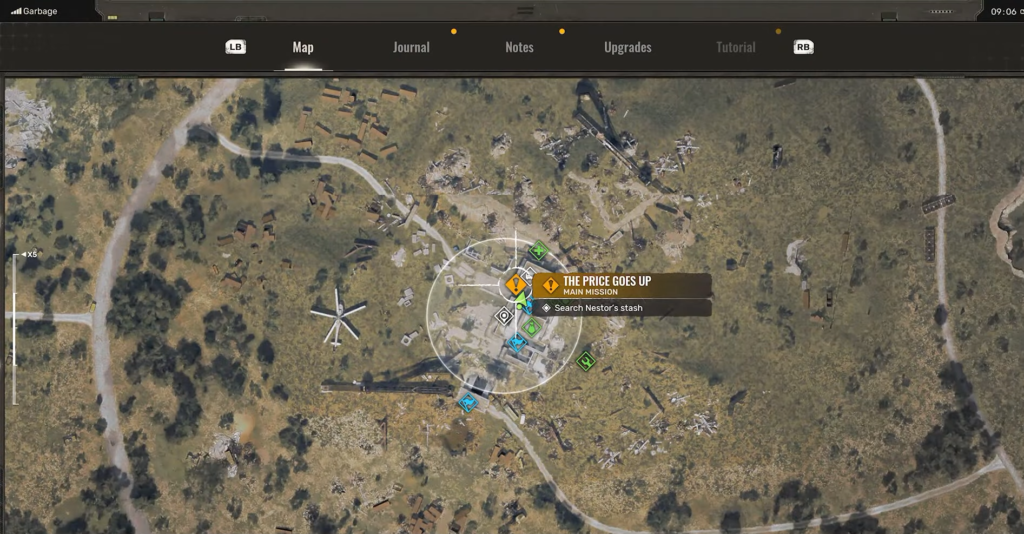
To find Nestor’s stash, you should know about the mission called “The Price Goes Up.” In this mission, you will learn about Nestor, who is in charge of the Slag Heap area. This area is known for being dangerous and having many hidden treasures. As you explore, you will meet different characters and face various situations that make your experience in the game more interesting. Knowing what to expect will help make your search easier and more enjoyable.
Where to Find Nestor’s Stash in Stalker 2 Heart of Chornobyl
Start your search by going to the Slag Heap area. You can find this area marked on your map. The Slag Heap is full of old buildings, debris, and machinery left behind from past events. Be ready for possible dangers, such as hostile creatures and other stalkers who might attack you.
- Find the Slag Heap: Open your map and look for the Slag Heap area. It will have a special icon to help you find it.
- Get Ready: Make sure you have enough supplies like weapons, healing items, and food. You may face threats along the way, so being well-prepared is very important for your safety.
Climbing Up High
When you arrive at the Slag Heap, look for scaffolding on your right side. Climbing this scaffolding will give you a better view of the area and help you get closer to Nestor’s stash.
- Climb the Scaffolding: Carefully climb to the top of the scaffolding. Take your time as you go up to avoid falling.
- Jump to the Crane Arm: From the top of the scaffolding, jump across to a nearby crane arm. This jump may take some practice, so focus on landing safely.
Moving Toward the Bus
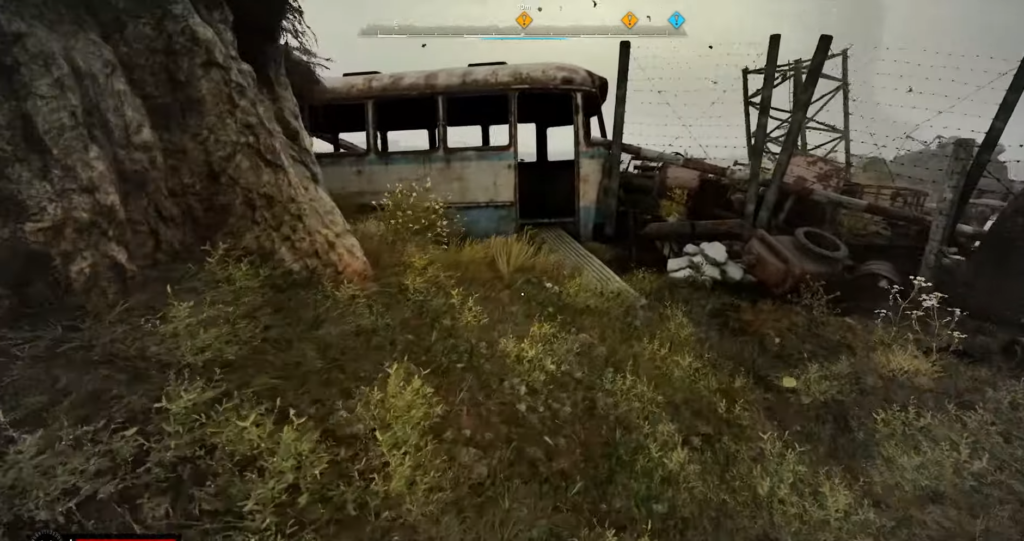
After reaching the crane arm, continue moving right along it. Follow any markers that appear on your screen; these markers will guide you toward your goal. Your next stop is an old white and blue bus.
- Walk Carefully: Move along the crane arm slowly to keep your balance.
- Reach the Bus: Once you see the bus ahead, walk through its entrance to get closer to Nestor’s stash.
Entering the Cave
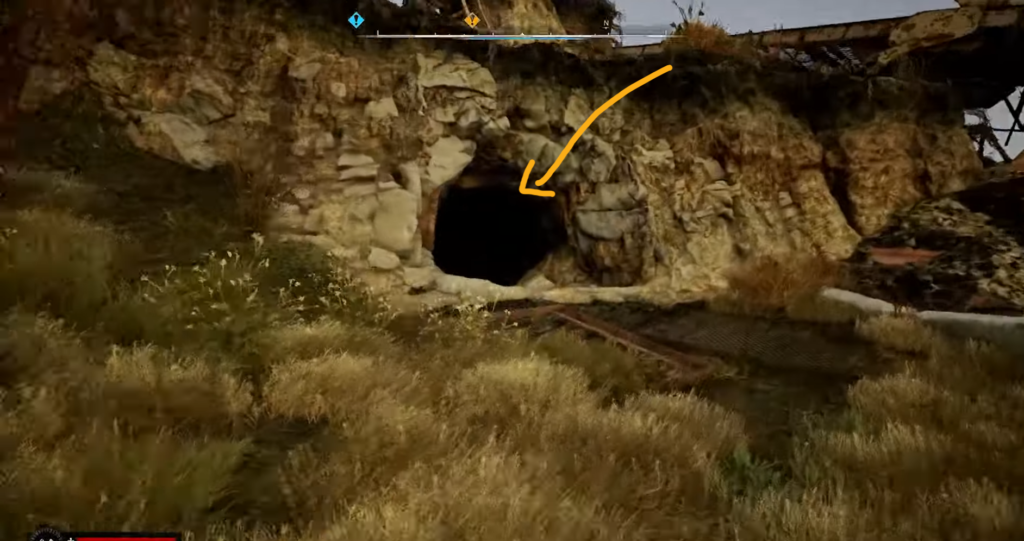
After going through the bus, you will notice a grassy path leading into a cave nearby. This cave has some dangers inside, so be careful as you explore.
- Go Down the Path: Walk down the grassy path and enter the cave cautiously.
- Watch for Hazards: Inside, be careful to avoid any toxic areas or anomalies that can hurt you as you explore deeper into the cave.
Climbing Out Safely
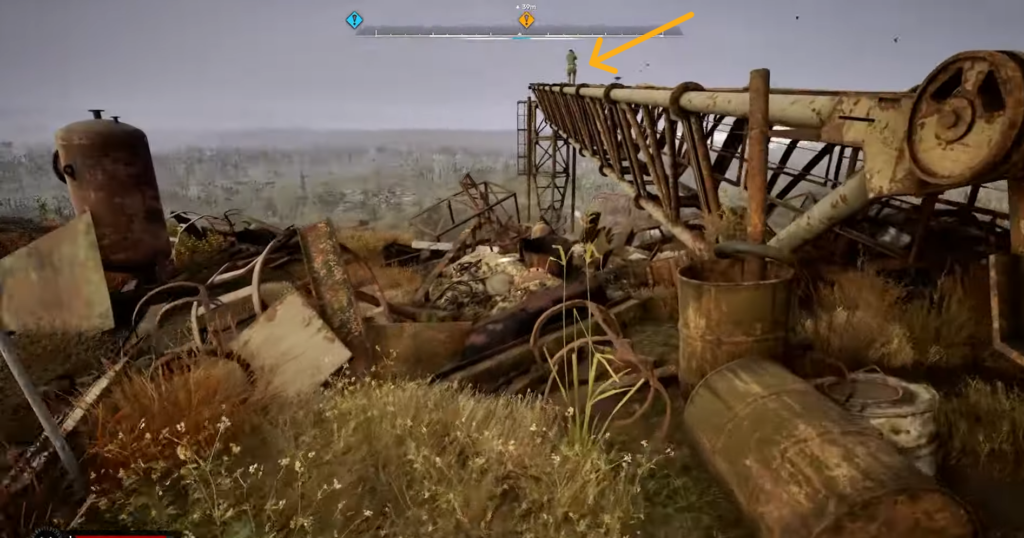
As you explore deeper into the cave, look for a ladder that leads upward. Climbing this ladder will take you out of the cave and back into an open area where you can continue searching for Nestor’s stash.
- Find and Climb the Ladder: Look for a ladder inside the cave and climb it quickly but carefully.
- Exit into Fresh Air: Once you reach the top of the ladder, step outside into fresh air where you can see more of your surroundings.
Meeting Richter
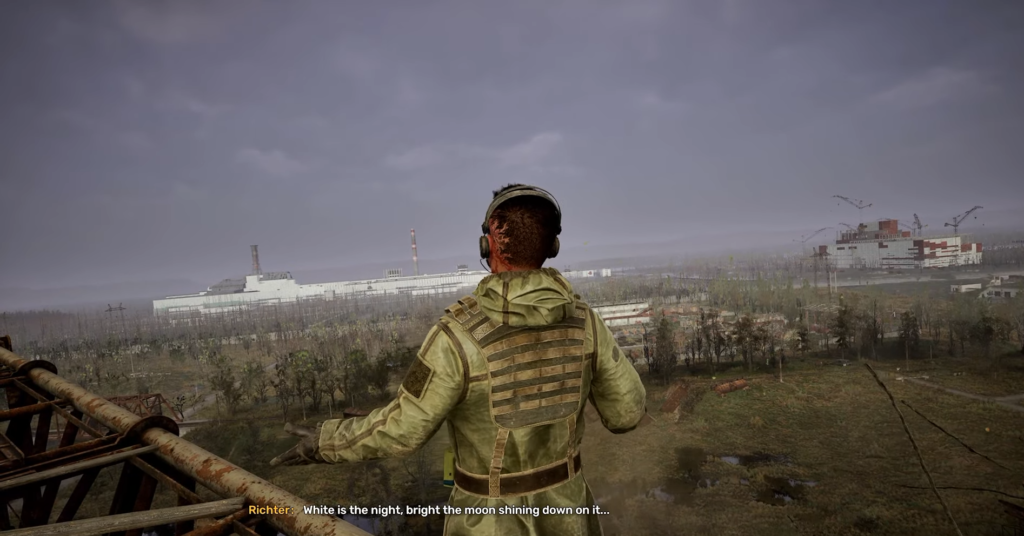
When you exit into fresh air, walk toward a figure standing on a crane; this person is Richter. Talking to him starts a cutscene that gives important information about your mission.
- Watch What Happens: Pay attention to any dialogue or cutscenes when you talk to Richter.
- Get Your Token: After speaking with Richter, he will give you a token for a free ride on the Prypiat ferris wheel, which can be helpful later in your adventure.
Looting Nestor’s Stash
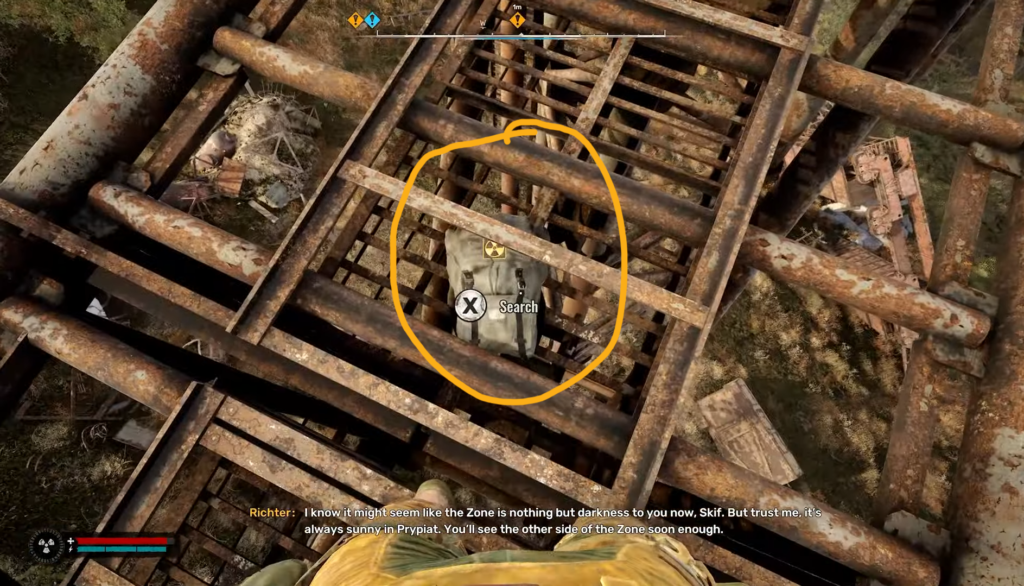
Now it is time to find Nestor’s stash at the end of the crane where it is hidden between metal slats. This stash contains many useful items that will help you in S.T.A.L.K.E.R. 2.
- Walk to the End of the Crane: Carefully walk toward where Nestor’s stash is located at the end of the crane.
- Collect Important Items: Interact with the stash to gather items like an M860 Cracker, medkits, grenades, anti-radiation drugs, and most importantly, Nestor’s Flash Drive.
Tips for Success
Finding Nestor’s stash can be challenging but rewarding if players follow these tips:
- Stay Alert: Always watch out for enemies or anomalies while exploring.
- Use Your Map: Check your map often for directions and markers that guide you toward objectives.
- Save Often: Save your game frequently so that if something goes wrong during your exploration, you do not lose progress.
- Explore Thoroughly: Take time to explore each area fully; sometimes hidden paths lead to extra loot or information.
Also Read This Guide: Should You Help Gloomy in STALKER 2? “Dangerous Visitors” Quest
Finding Nestor’s stash in Stalker 2 involves careful exploration and talking with characters like Richter. By following these steps in this guide, players can successfully locate and loot Nestor’s stash while enjoying their adventure in this exciting game world. Remember to stay alert for dangers along your journey and make good use of all items found in Nestor’s stash to improve your gameplay experience! Enjoy exploring every corner of this rich environment as you uncover its secrets!

